Authorizations
Tap the Authorizations toolbar button  to view or receive customer authorizations for tickets and texting.
NOTE: You must set up your configuration for authorizations before using this feature in the R.O. Writer DVI app.
Obtaining Estimate Authorizations from the Customer
Estimate authorizations apply to estimates and repair orders. The customer is approving the services, which authorizes your shop to begin work.
NOTE: Estimate authorization is configured in DVI Command.
To Authorize a Ticket
Complete these steps:
-
Tap the Authorizations toolbar button
> Estimates tab.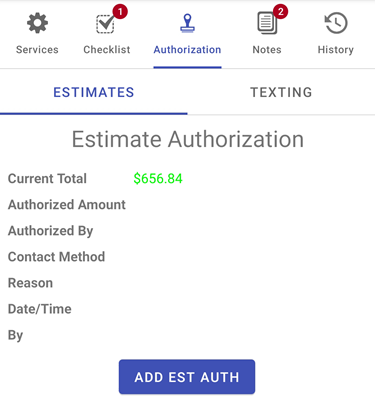
- Tap the Add Est Auth button.
-
On the Estimate Authorization screen, fill in the information in the fields.
.png)
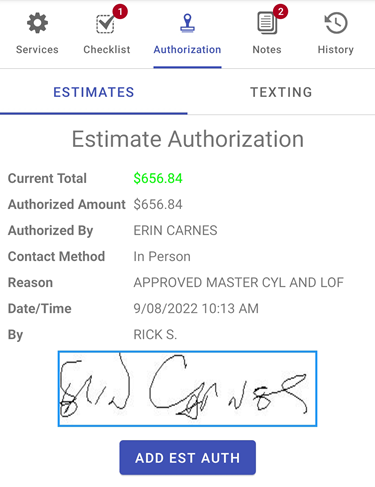
- Tap the Contact Method to see a list of ways you can obtain authorization.
- Select In Person Signature. This is the recommended method.
-
Tap the Get Signature button. The signature field appears.
-
Have the customer sign in the field provided.
.png)
Tap the Clear button in case there is a mistake in the signature.
-
Tap OK once to save the signature.
-
Tap Save.
.png)
-
The screen updates and shows the signature confirming you have received the customer's approval for the ticket.
Obtaining Texting Authorization from the Customer
According to United States texting regulations, you must obtain express written consent from customers before sending them the first text. Failure to do so can result in fines.
You can obtain that written consent in the Texting Authorization feature described below.
NOTE: Texting authorization is configured in DVI Command.
To Obtain a Texting Authorization From a Customer
Complete these steps:
- Tap the Authorizations toolbar button > Texting tab.
- The customer’s mobile number appears in the Mobile Phone field. Verify this number.
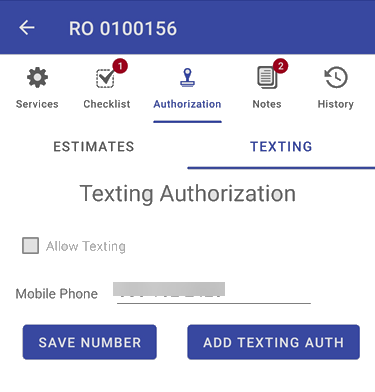
- Tap the Add Texting Auth button. The Texting Authorization Statement appears.
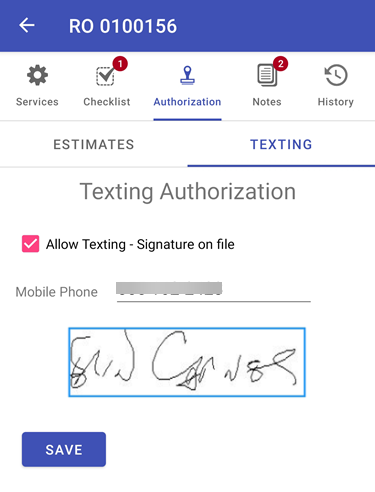
- Have the customer sign in the field provided.
.png)
Tap the Clear button in case there is a mistake in the signature.
- Tap OK once the signature is received.
-
The Texting tab screen updates with the signature.
-
Tap Save. The customer has authorized you to send texts.