Opening a Checklist in DVI Command
To open a checklist in DVI Command, click the Checklists tab and click the Select link of the checklist you want to open.

You can also click the checklist symbol on the ticket tile in SmartStatus.
A detailed view of the checklist opens.
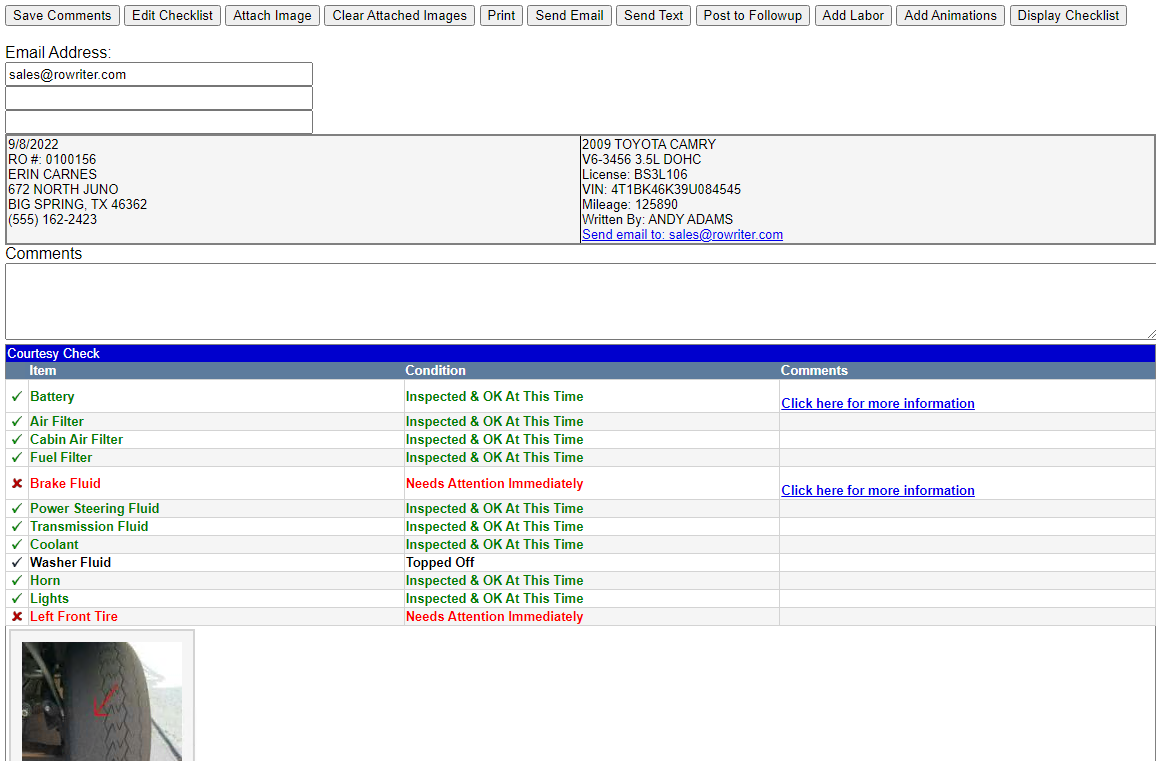
NOTE: This is the checklist the technicians and service writers see in DVI Command. The customer does not see the checklist in this format.
Toolbar
There are two toolbars: one at the top of the window and one at the bottom of the window. The buttons are the same.

|
Setting |
Description |
|---|---|
|
Save Comments |
Click to save comments added in the Comments text box to the checklist. |
|
Edit Checklist |
Click to edit the checklist items and their conditions. |
|
Attach Image |
Click to attach an image to the checklist. The images available to select are the images added in the R.O. Writer DVI app. |
|
Clear Attached Images |
Click to clear all images attached to the checklist. |
|
|
Click to print the checklist. |
|
Click to email the checklist. The checklist is emailed to the addresses in the Email Address fields. |
|
|
Send Text |
Click to text the checklist to the customer. The text is sent to the number as set up in the configuration. |
|
Post to Followup |
Click to add to Marketing/Followup in R.O. Writer. |
|
Add Labor |
Click to add labor operations to the checklist items. |
|
Add Animations |
Click to attach animations to checklist items. These animations can be viewed by the customer when they receive the checklist. |
|
Display Checklist |
Click to view the customer-facing version of the checklist. |
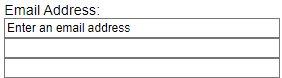
Email Addresses
When a checklist is emailed, the checklist is sent to each email address entered in these fields. The first field contains the customer’s default email address.
If no email address is entered for the customer, the first field prompts you to enter an email address.
Comments
Type in general information about the checklist in the Comments field. Click the Save Comments button to save these comments to the checklist.
Customer and Vehicle Information
The ticket and customer information appear below the email address fields.

Customer Information
- Date - When the ticket was created.
- Ticket number - RO # or Est #.
- Customer - Name, address, and phone number.
- Send email to - The customer's email address (appears with the vehicle information). Click the link to email the checklist.
Vehicle Information
- Year, Make, Model
- Engine
- License - The license plate number.
- VIN - The VIN Number.
- Mileage - The current mileage.
- Written by - The name of the service writer assigned to the ticket.
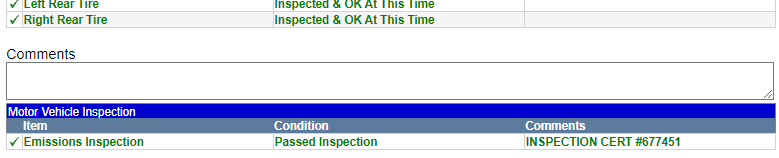
Checklist Table
The header row of the table is the name of the checklist.
The table rows show the checklist items, their condition, and comments.
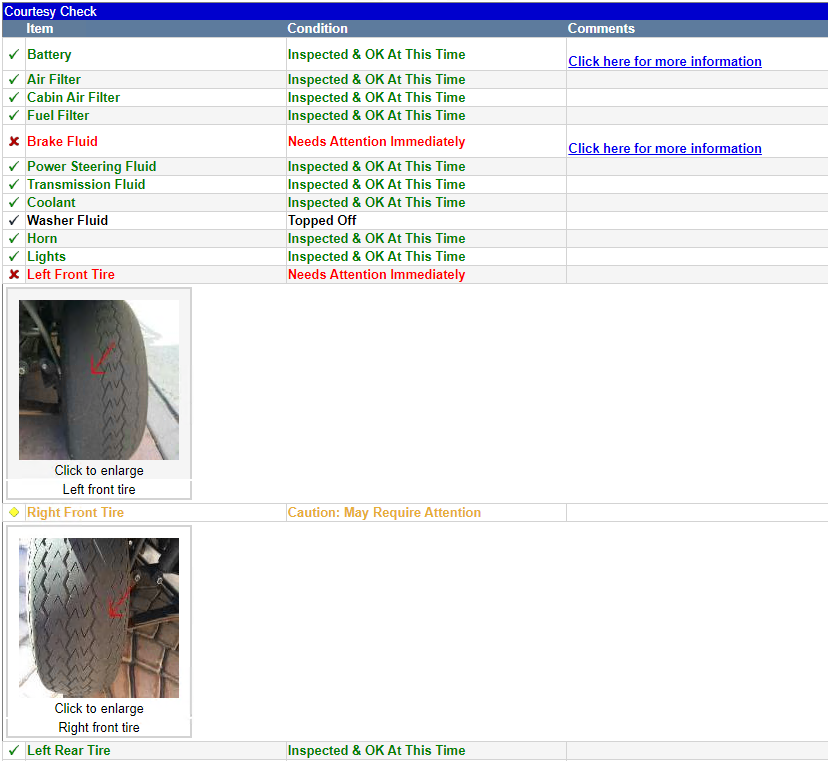
NOTE: The symbols and colors used for the items can be configured in the checklist settings.
|
Column |
Description |
|---|---|
|
Item |
The name of the item and the condition symbol.
If an image is attached to the item, an image appears below the line. Images are attached to checklist items in the R.O. Writer DVI app. |
|
Condition |
The condition of the item in the checklist. The text and color correspond to the symbol. |
|
Comments |
The item comments. If an animation is attached, A “Click here for more information” link appears. Click this link to see the animation in a new browser tab. |
 means the items passed.
 means the item needs attention.
If there is more than one checklist attached to a ticket, a second set of Comments and table rows appear just below the first checklist. The header row is the name of the checklist.