Checklists
Tap the Checklists toolbar button  to see the checklists assigned to a ticket. The Checklists tab displays the checklists assigned to the ticket. The checklist icon indicates the status of the checklist:
- Green means all items passed inspection.
- Red means some items did not pass inspection.
.png)
NOTE: Checklist must be configured before using checklists in the R.O. Writer DVI app.
Completing the Checklist
When the technician goes through a checklist, he or she checks which items pass inspection or need attention.
Complete these steps:
-
Tap the checklist name.
-
The list of checklist items display.
- Complete each item section.
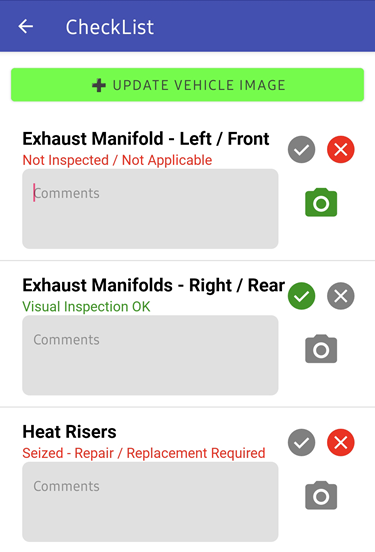
To Complete an Item Section
If the item section has a yellow bar along the left margin, it means you need to complete that item.

To complete an item:
-
To pass the item, tap the gray checkmark button
 . The button turns green and the description appears in the section.
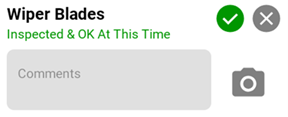
-
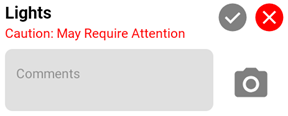
To fail the item, tap the gray x button
 . Tap the appropriate condition on the popup window.
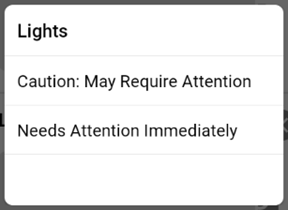
The gray x button turns red and the description appears in the section.
- To take a picture or video, tap the camera button
 . The image and video tools open.
 - To add information, tap in the Comments section and type the information.
Adding a Vehicle Image
Complete these steps:
-
Tap the Update Vehicle Image button.
.png)
-
Click the Camera button to take a picture with the phone. Click the Gallery button to select an image stored on the phone.
.png)
-
Add a comment to the image.
.png)
- Tap the Save Veh button.
Previewing the Customer-Facing Checklist
You can preview what the checklist will look like when the customer opens it from an email or text.
To Preview the Customer-Facing Checklist
Tap the Display Checklists button.
.png)
The customer checklist displays. This is what the checklist texted to the customer looks like.
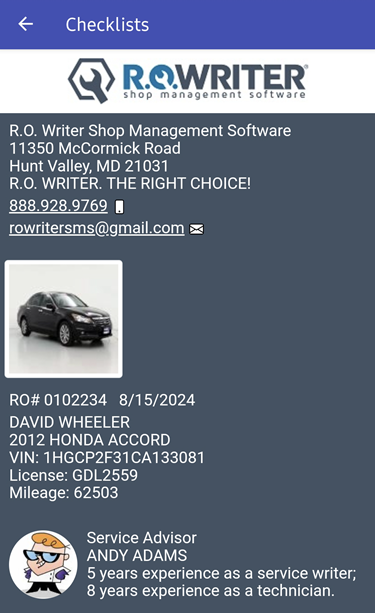
The checklist displays the following information
- Shop Name
- Shop Address
- Shop Phone Number
- Shop Email Address
- Vehicle Image
- Ticket Number
- Ticket Date of Creation
- Customer Name
- Vehicle Information
- Technician Information
In Checklist Version 2, you can sort checklist items by their condition. Tap the checkmark icons at the top of the list to sort the checklist items and see which items need attention first.
.png)