Items
Checklists are made up of individual items. Items are mainly parts of a vehicle labor operation (e.g., Check AC, Check Engine Oil, etc).
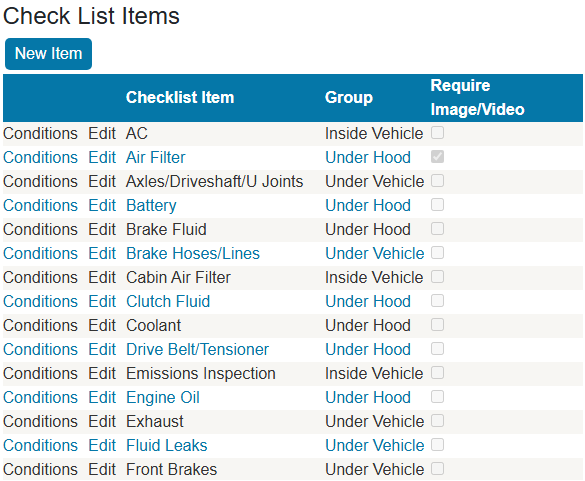
On the Check List Items window, you add, edit, or delete items. You can also assign conditions and groups to items as well. You can also have a checklist item require an image or video attachment whenever that item is used in a checklist on a ticket.
To Add New Items
Complete these steps:
- Click the New Item button.
-
Type in the name of the Item.
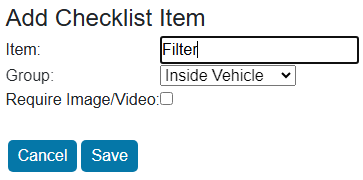
- In the Group dropdown list, select the group name.
- The Group dropdown list appears only if Checklist Version 2 is selected in the Options setting.
- Click Save. The new item is added.
To Edit Existing Items
Complete these steps:
- Click the Edit link on the item row you want to edit.
- You can rename the item in the Checklist Item field.
-
You can change the group in the Group dropdown list.
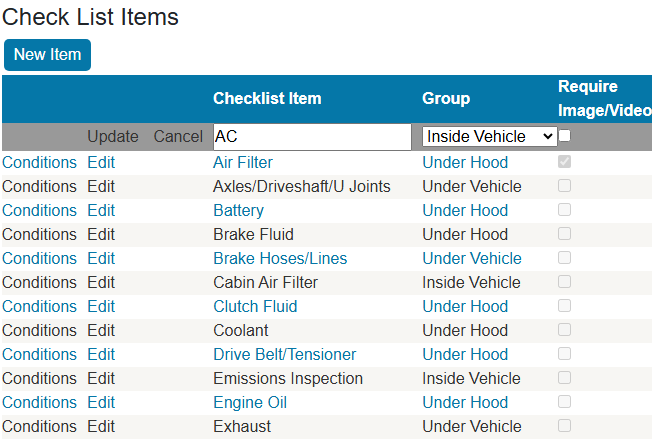
- Click the Update link to save the change.
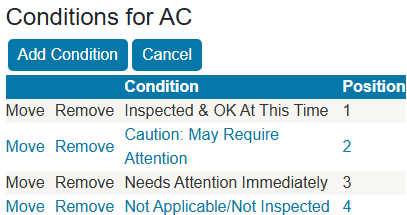
To Add a Condition to an Item
You create conditions in the Conditions setting and assign those conditions to items in the Items setting. Conditions display on checklists.
Complete these steps:
-
Click the Conditions link on the item row. The Condition window opens.
- Click the Add Condition button.
- Click the Move link to change the position of the condition in the list.
- Click the Remove link to remove the condition from the item.
-
In the Item dropdown list, select the condition.
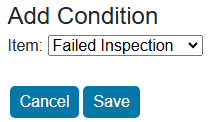
- Click Save. The condition is added.
Grouping Items
After creating groups in the Groups setting, you can add checklist items to those groups.
NOTE: The Groups setting does not appear in Configuration until Checklist Version 2 is selected as the checklist format in the Options setting.
To Group Checklist Items
Complete these steps:
- Click the Configuration tab > Items in the Checklist Settings section.
- Click the Edit link of the checklist item you want to add to a group.
-
Click the Group dropdown list and select the group. This list contains all groups created in the Group setting.
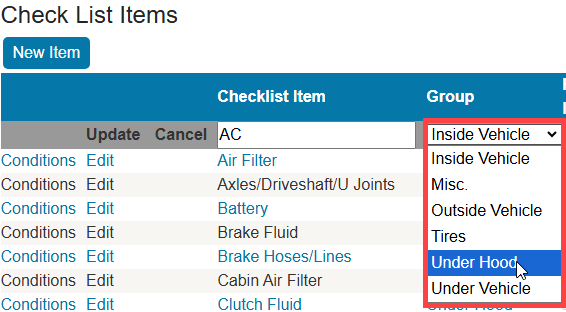
- Click the Update link to save the group selection. The item is now in the selected group.
- Repeat Steps 2—4 until the group contains all items you want in that group.
To Reorder or Delete Items in Groups
The order of items in the group is determined by the Position setting of the item in the checklist.
Complete these steps:
-
Click the Configuration tab > Checklists in the Checklist Settings section.
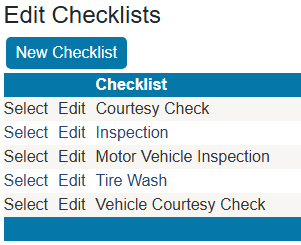
- Click the Select link of the checklist that contains the items you want to modify. The items in the selected checklist display.
- Click the Move link to change the position of the item.
-
Type in the new Position number.
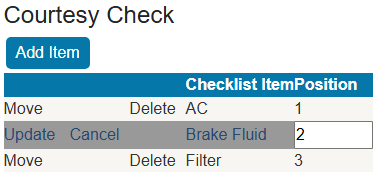
- Click the Update link. The items in the list are reordered according to the new Position.
Requiring an Image or Video for Checklist Items
If a checklist item has this setting enabled, using it in a ticket will require you to attach an image or video to it in the DVI app.
Complete these steps:
- Log into R.O. Writer DVI Command.
-
Click Items under the Checklists column of the Configuration window.
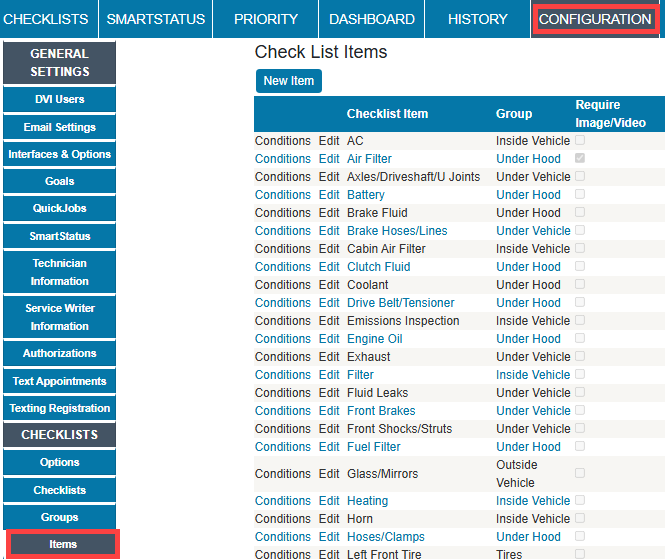
- For the item that requires an image or video, click Edit.
-
Check the Require Image/Video box.
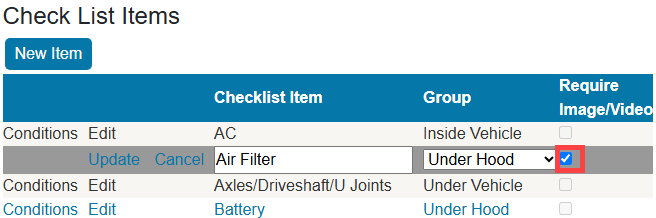
- Click Update.
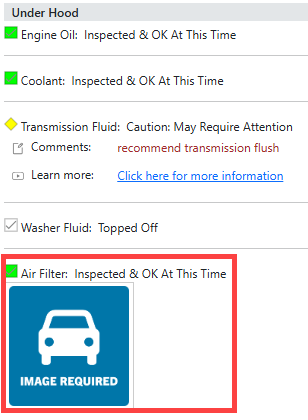
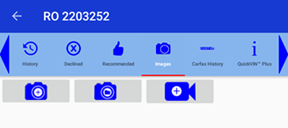
When an Image or Video is Required
When an image or video is required for a checklist item, selecting a condition for that item in the checklist will automatically redirect you to the Images screen. You can take an image, record a video, or attach an image or video from your device’s gallery.
Until the required images are taken, the checklist icon remains red in both R.O. Writer DVI Command and the DVI app  .
.
Viewing a checklist in R.O. Writer DVI Command will also show which items do not have an image or video attached to them if the setting is enabled for that specific item.