DVI Users
Users are created in Central Service. Then, you do the following in the DVI Users setting:
- Refresh the list of users from Central Service.
- Enable users so they can access the DVI Suite.
- Choose the user role for DVI (i.e., Employee, Service Writer, and/or Technician).
- Choose the areas and functionality the user can access by checking the checkboxes in the columns.
NOTE: The user record, username, and password are stored in the R.O. Writer database. However, the username and password can be changed only in the Central Service and not in the DVI Users setting.
Accessing the DVI Users Setting
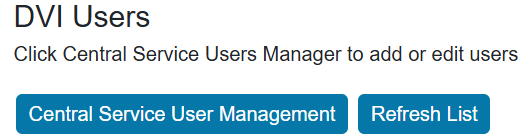
Click DVI Users in the Configuration settings column. The DVI Users window opens, displaying the list of current users. (The list does not include the user currently logged in.)
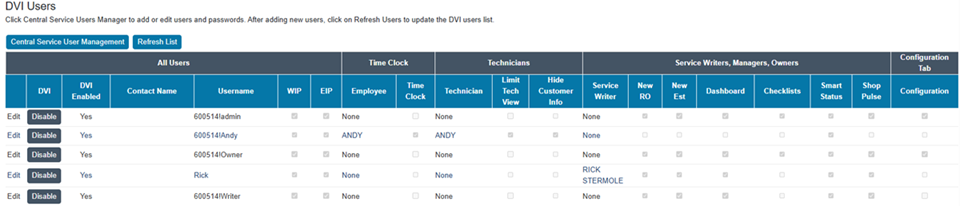
- Click the Central Service User Management button to open the Users Manager setting in Central Service.
- Click the Refresh List button to refresh the list of users from Central Service. New users appear at the bottom of the list.
- Click the Edit link to edit the user settings in the DVI Suite (starting at the Employee column).
- Click the Disable button to deny the user access to the DVI Suite.
- Click the Enable button to grant the user access to the DVI Suite.
To Create Users in Central Service
You create a new user in the Users Manager setting of Central Service.
Roles Available to Use for DVI
You can select any role for DVI as needed. However, there are two user roles in Central Service that for DVI: DVI User and User Manager
-
DVI User, which can help you track your DVI users in Central Service.
-
User Manager, which allows you to create other users (except for Admin users) but restricts access to other parts of Central Service like DVI Reports.
NOTE: To create a user in either role, your account must have permission to create a user in Central Service.
To Create Users for DVI
Complete these steps:
-
Open DVI Command and click Configuration > DVI Users.

-
Click the Central Service User Management button.
-
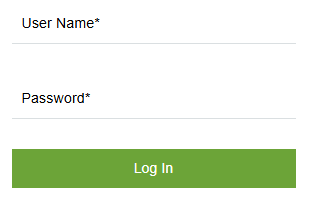
The Central Service login screen opens. Enter your login credentials.
-
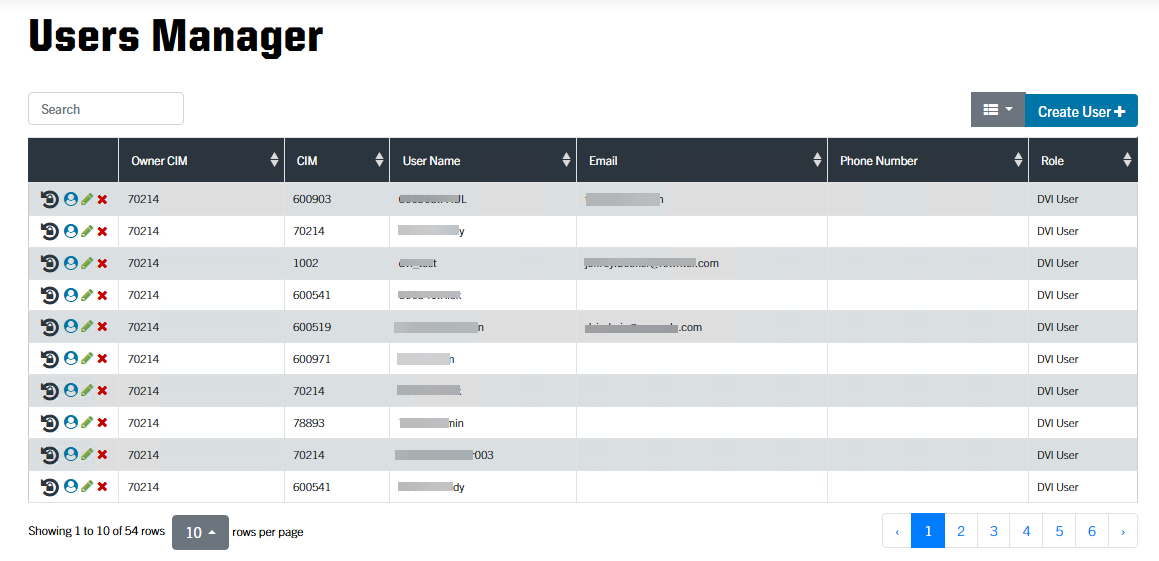
Click the Log In button. The Users Manager window opens.
-
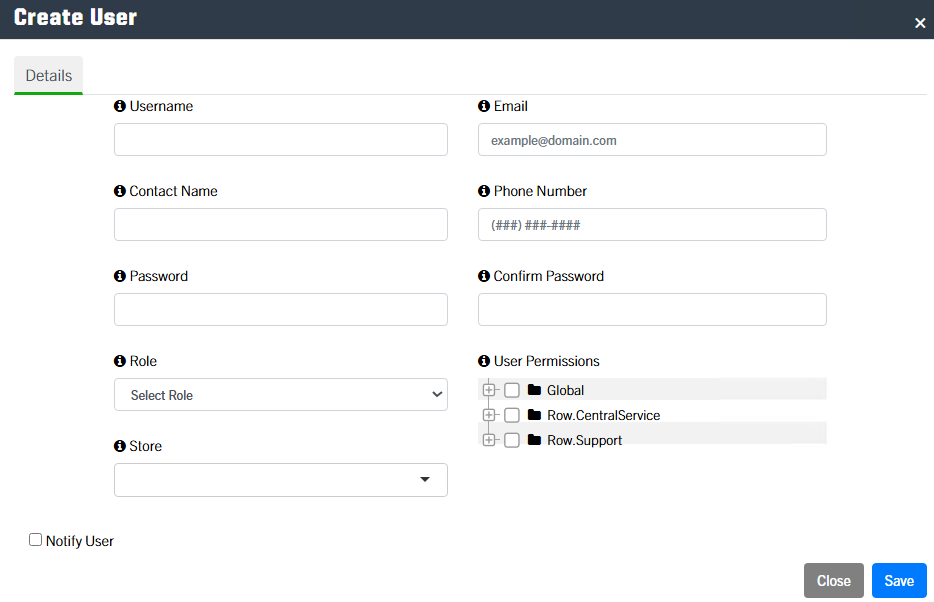
Click the Create User+ button. The Create User window opens.
NOTE: If you do not have permission to create a user, a message appears saying that you are not authorized to create users.
-
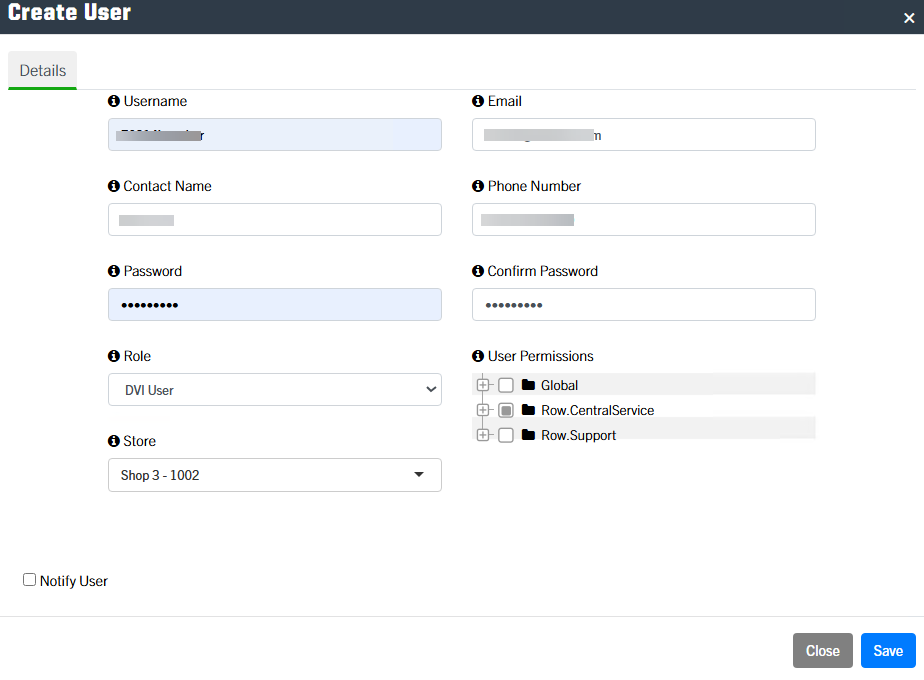
Type in the Username and Password. Confirm the Password.
-
Enter the user’s Email, Contact Name, and Phone Number.
-
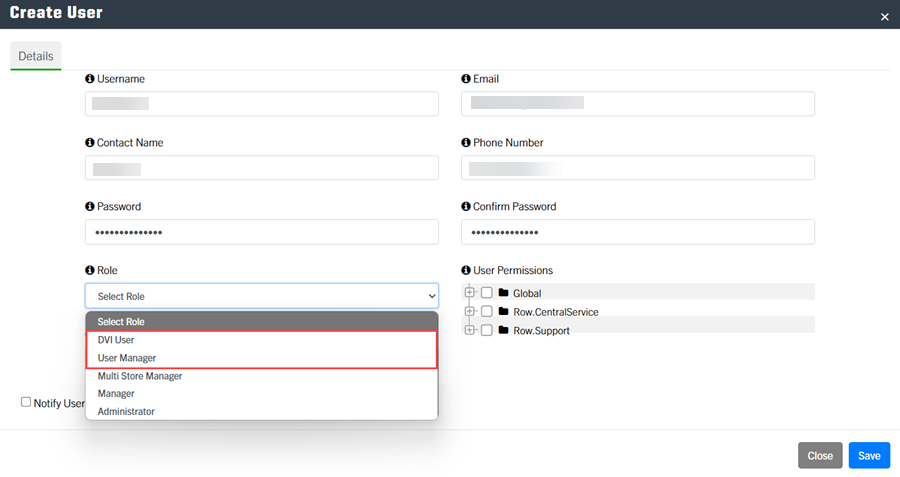
Select DVI User or User Manager in the Role dropdown list.
NOTE: You can also select any Role in the dropdown list depending on your business needs.
NOTE: If you want to give a user with the User Manager role access to DVI Reports in Central Service, you can check the Central Service Access checkbox in the User Permissions list.
-
Select the Store in the dropdown list. Selecting the store connects the user to your store in DVI. (You can select multiple stores for a user.)
-
If you want to notify the user with an email, check the Notify User box. The user will receive an email when you click Save.
-
Click Save, and the user is created in Central Service.
To Enable a User in DVI Command
You need to refresh the list of users and then proceed with user setup in DVI.
Complete these steps:
-
Open DVI Command.
-
Click the Configuration tab in DVI Command to open the DVI Users list and click Refresh List. The new user appears at the bottom of the list.
-
Click the Enable button to activate the user in DVI.
-
Now you can edit the user settings.
User Settings in DVI Users from Central Service
There are some settings from Central Service that cannot be modified in the DVI Users setting.
|
Setting |
Description |
|---|---|
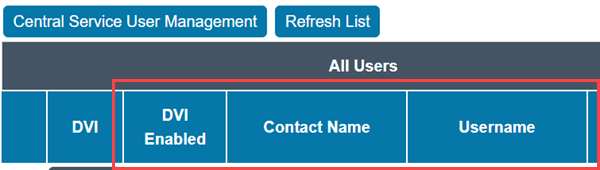
|
DVI Enabled |
This is a text-only field that indicates if the user is enabled (i.e., can access DVI) or disabled (i.e., cannot access DVI). |
|
Contact Name |
This name you use to contact the user. |
|
Username |
This is the username assigned by Central Service. The format is: “[The DVI license number]![Name]”. Users use the name after the “!” as their username when they log in. |
To Edit DVI Users
When you edit a user record in the DVI Users setting, you are editing the user’s access to specific functionality in DVI.
Complete these steps:
-
On the DVI Users window, click the Edit link in the first column of the user record. The values you can edit become active.

- Use the Employee, Service Writer, and Technician dropdown lists to determine what kind of user this is.
- Check and uncheck each permission as desired.
-
Click the Update link, and the changes are saved.

DVI User Settings
The following table describes the permission settings that grant the user access to specific areas and functionality of DVI Suite.
| Header | Setting | Description |
|---|---|---|
|
All Users |
WIP |
Check to allow the user to
|
| EIP |
Check to allow the user to
|
|
| Time Clock | Employee |
Select a name from this dropdown list to allow this user to access the Time Clock in the R.O. Writer DVI app. The Time Clock allows them to check into and out of their shifts. If a name is not selected, the user cannot access the Time Clock in the DVI app. |
| Time Clock |
Check to display a time clock button for the user in the DVI app. Do this only if the user is associated with an employee. |
|
| Technicians | Technician |
The technicians in this dropdown list are created in R.O. Writer. When you select a technician, this user sees the technician's tickets in R.O. Writer DVI Command and the Technician View in the R.O. Writer DVI app. Users who work on vehicles should be associated with a technician. Select None if you do not want a technician attached to this user's account. |
| Limit Tech View |
Check to limit which technician’s jobs the user can see in the Technician View in the R.O. Writer DVI app. If checked:
|
|
| Hide Customer Info |
Check to hide the customer's personal information (such as contact number and home address) on the Customer/Vehicle screen in the R.O. Writer DVI app.
|
|
| Service Writers, Managers, Owners | Service Writer |
The service writers in this dropdown list are created in R.O. Writer. When you select a service writer in this dropdown list, that service writer is automatically assigned to any ticket this user creates. Select None if you do not want a service writer attached to this user's account. |
| New RO | Check to allow the user to create new repair orders in the DVI app. | |
| New EST |
Check to allow the user to create new estimates in the DVI app. |
|
| Dashboard | Check to allow the user to access the Dashboard in DVI Command. | |
| Checklists |
Check to allow the user to access the Checklists window. |
|
| SmartStatus |
Check to allow the user to access the SmartStatus window in DVI Command. |
|
| ShopPulse |
Check to display sales data for the shop in ShopPulse in the R.O. Writer DVI app. |
|
|
Configuration Tab |
Configuration |
Check to give the user administrator rights, which gives the user access to the R.O. Writer DVI Configuration settings. |
To Disable DVI Users
You cannot add or delete users in the DVI Users setting. Those tasks are performed only in Central Service.
If you want an existing user to no longer have access to DVI, you can disable their user record in the DVI Users setting. To remove a user’s access to DVI, click the Disable button on their user entry in the table.
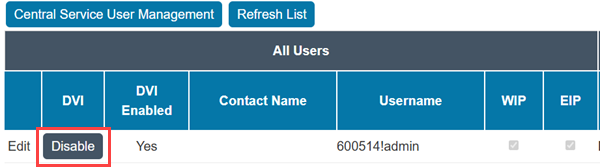
- The user moves to the bottom of the list.
- The DVI Enabled setting changes to “No”.
-
The Enable button replaces the Disable button.
- The user no longer has access to DVI.
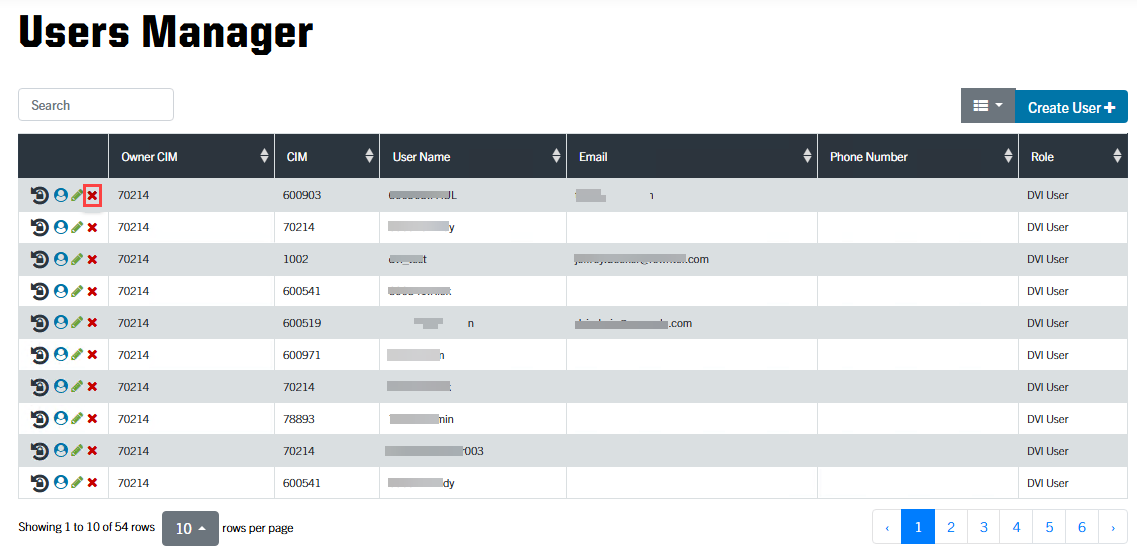
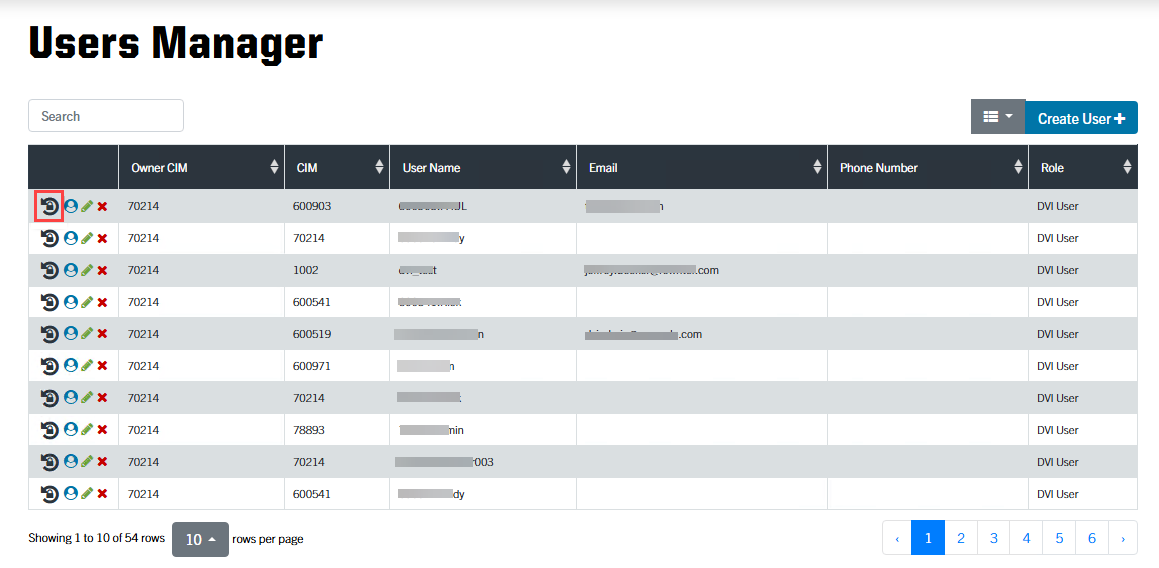
To Delete DVI Users
Please note that if you don’t want the user to have access to DVI, you don’t have to delete the user in Central Service. Instead, you can keep the user active in Central Service but disable the user in the DVI Users setting.
Complete these steps:
-
Open DVI Command. Click the Configuration tab in DVI Command to open the DVI Users.
-
Click the Central Service User Management button and log into Central Service.
-
The Users Manager opens.
-
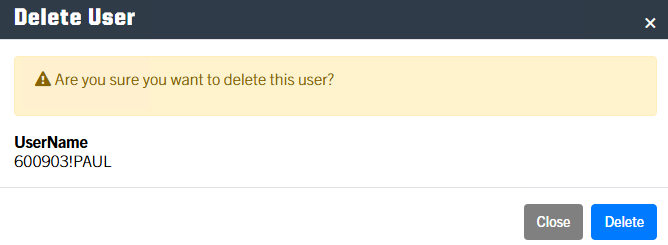
Click the red X next to the user in the Users Manager.
-
Click Delete on the prompt.
-
The user is now deleted.
To Reset DVI User Passwords
Complete these steps:
-
Open DVI Command. Click the Configuration tab in DVI Command to open the DVI Users.
-
Click the Central Service User Management button and log into Central Service.
-
The Users Manager opens.
-
Click the password reset icon next to the user in the Users Manager.
-
Enter the new Password, confirm it, and select Save to reset the user password.
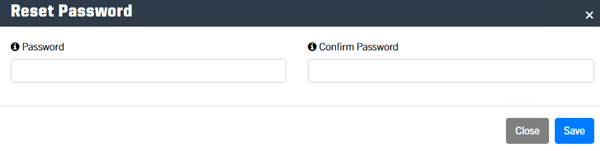
-
The user password is now reset.